I came across this great resource on Slideshare posted by Jane Hart, a social learning consultant and founder of The Centre for Learning and Performance Technologies.
Saturday, January 9, 2010


Friday, August 28, 2009
Warning Label Generator Can Be Very Effective in Reaching Students
When I was a freshman in college, my composition teacher, Mary Daly, insisted that we never use the word very in our writing because
it was a dead adjective that didn't describe anything. I still find myself using the word in my writing, but because of Mary, whenever I do, I am prompted to think of a more descriptive adjective.
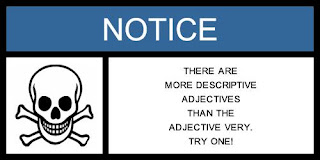
I used the Warning Label Generator, which I found the link to on the excellent social media site Mashable, to create this warning label for my students. What better way to caution them against using the adjective very then to attach it to a skull and crossbones. I'm creating additional graphics to post on various Blackboard pages. That should get their attention.
There are several easy steps to create a graphic like this.
Step 1: Choose a warning label such as Warning, Caution, Danger, Think, Be Careful, Safety First, Safety Notice, or just plain Notice.
Step 2: Choose one of over 40 symbols. There are some really fun ones. I can't wait to use Godzilla grabbing an airplane.
Step 3: Type in your warning.
Step 4: Click "Generate Warning Label."
Step 5: Right click on the graphic and hit "Save As" to save it onto your hard drive.
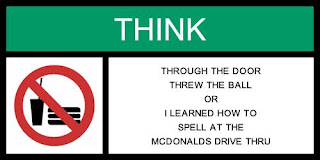
The next warning label I'm going to post will address one of my biggest pet peeves at a writing instructor:
Tuesday, August 25, 2009
Top 5 Grammar Girl Podcasts that Every Freshman in College Should Listen To
I love Grammar Girl's Quick and Dirty Tips for better writing. Her podcasts are awesome: so helpful and informative. As school starts this fall, I decided that a blog post with five great links podcasts and transcripts that cover some of the most common errors I see in student work would be in order.
- Comma Splice. If you ask a group of student what a fragment or a run-on sentence is, there's a good chance they can describe one to you, but ask 'em about a comma splice, and there's a universal blank that sweeps across their faces. So what's a comma splice? It's basically a run-on sentence with a comma seperating the two main clauses that run together. I guess they're hard to identify because there are so many reasons to use a comma, so there's not an obvious test to check for them during the editing process.
- Which versus That. Another area of contentions in student writing is the use of that verses which. I have found that most students use that correctly when they use it, but that it is not uncommon to mistake which for what should be that. Grammar Girl does a wonderful job explaining the difference by defining the restrictive that modifier, which is needed for the sentence to make sense, and the nonrestrictive which modifier, which can be left out and have the sentence still make sense. Another issue in the that/which debacle is punctuation. Just remember punctuation isn't necessary with restrictive modifiers (that), but is necessary with nonrestrictive modifiers (which), which can be left out of the sentence.
- Active Voice versus Passive Voice. Okay, so this isn't a common-error issue; however, I would be remiss if I ignored students' tendency to be overly wordy by using passive voice in their writing. To create clear and direct sentences, instructors typically prefer active voice in academic writing.
- How to Use Parallel Construction Correctly. Understanding parallel structure comes in handy in writing. It helps clarify your statements and has a pleasing rhetorical effect on the reader.
- Top Ten Grammar Myths. This podcasts debunks common myths about the use of language. Do you think that a run-on sentence is a really long sentence? Have you ever been told not to start a sentence with the word however? Do you use the word irregardless? These and many other questions will be answered in this podcast.
Friday, July 24, 2009
Google Reader 101
Ever see that orange RSS logo on a website and wonder "what's the deal with all these logos?" Been there. But I learned quickly that when you hit the button, you subscribe to the website in what's called a reader. There are a variety of readers available on the web, but since I'm a Google Girl, I subscribe to all my sites in Google Reader.
It's great. I can get updates from a variety of websites, pick and choose which sites I actually want to visit, and skim posts for the ones I actually want to read.
Once you start subscribing, you'll likely find that there's a lot of great stuff out there. It may then become necessary to organize your stuff. Google Reader allows you to do this by placing your subscriptions into folders.
I started using Google Reader soon after I set up my blog The Adventures of Mr. Busypants. At first, I subscribed to other mom blogs about autism. Then I branched out into other mom blogs. Next, because I want to publish someday, I started to subscribe to publishing and writing sites. More recently, I tapped into my love for teaching and have subscribed to countless teaching blogs.
One thing I love about having a reader is it keeps me connected to other bloggers. It's also a quick way to check out a bunch of blogs to see what you want to read at a particular time. If I'm not interested or know I don't have time for the blog, I simply scroll past it on my reader. If I decide it's something I want to review later, I check "Keep unread." If I really love the post and want to keep it handy, I star it. And if I want to share it with a blog buddy, I either hit "Share" or "Share with comment" if I have something additional I'd like to add. I can even email posts to others or to myself.
Once I started subscribing to blogs, I found that my reader became one long list of things to read. I'd open it up and panic that I had 200 items to review. It got a little overwhelming, so I created categories and assigned each site I read to a particular category.
For example, when I come across a new author who writes about things similar to what I write, I subscribe and put them in my "Author Blog" folder. Any site, discussion board, or blog that deals with autism either goes into "Autism" or "Autism Blog." I also subscribe to several Bible related sites, so those sites get filed under "Bible." All the general blogs I subscribe to go under "Blogs" although they may be better suited for a section called "Mom Blogs" since those are my people.
There's a "Blogging" section for subscriptions to blog carnivals, blog design sites, and my favorite blogging and social networking advice sites, ProBlogger and Mashable. In fact, one of the current stories on Mashable is Google Reader Gets a Social Makeover, Adds Likes and Followers. I'll mark that unread and save for later.
I have a section for each niche I'm interested in: "Publishing," "Writing," and "Teaching." There's also a section of unfiled sites, but when I click "Manage Subscriptions" at the bottom of the roll, I'll be able to easily categorize each unfiled site.
As I'm writing this post, I'm exploring reader more in-depth to be sure I haven't missed anything. Here's are some additional functions I've discovered:
- I can take a look at all the items I share with others (including notes if I made any) by clicking on "Notes" in the upper left region of the page.
- People can follow my reader and I can follow theirs. When we do this, the items we click on to share become accessible to everyone on our share list.
- There are additional share functions found under "Share Settings." I can choose to share a link to my Google profile, customize my reader URL, and find people sharing in Reader.
- That there's WAY more to Google Reader than I could even imagine and that I need to spend more time exploring and create a Google Reader 102 post later.
Related Articles
Thursday, July 23, 2009
Easy Screen Captures Anyone?

I must give credit where credit is due. I was reading a post in my reader from the Free Technology for Teachers site, and I came across this post that included one AWESOME web tool that you don't want to go without: Aviary.com.
Aviary.com allows users to capture any webpage with one easy step. Just add Aviary.com/ in front of any URL and boom, your screen shot is captured. You then have the option to edit and crop your shot, and save it as a pic to your desktop.
I tried it out immediately, but adding the Aviary url to my Mr. Busypants blog address:
http://mamabusypants.blogspot.com is my URL.aviary.com/http://mamabusypants.blogspot.com is the URL that led me to a screenshot to my blog.

Then I simply cropped what I wanted, the header, and saved to my desktop.
Click here for their instruction page.
Related Links
A Very Simple Way to Make Screen Captures
A Very Simple Way to Make Screen Captures
Wednesday, July 22, 2009
One Comment a Day Project
I love my Google Reader. I've connected to so many bloggers that I might not otherwise revisit as often as I do without the fabulous technology of a reader. Recently, I read a post from Steven at Blogging About the Web 2.0 Connected Classroom, that talked about a project created by another blogger, Andy, at iTeach called One Comment a Day.
The premise is simple (and copied and pasted from Andy's site):
Here is the process.
1. Read a blog
2. Post a comment that is insightful and constructive.
3. Tweet a link to the blog and your comment. Use the hash tag #OneComment
EXAMPLE: I just read a great piece on iTeach blog, check it out! #OneComment
4. Bookmark the blog and return to it another time.
It is just that easy! This Project will help create a positive forum for all who blog and comment. There are so many good educational blogs out there and I look forward to hearing your feedback and engaging in your comments!
The second phase of this project will be a featured blog a week project. This forum will review and promote one educational blog per week. It will also try and introduce new edu-blogs into the learning community. I will be setting up a Ning for this venture. The sole purpose of both ventures is to promote learning and create an engaging dialogue between so many great academic minds. The twitter hash tag for this will be #1Newblog
Please send me your thoughts, suggestions and feedback on both new ventures!I would also like to put together a small team to help with this venture due to the time consuming nature of the project. If you would like to help your fellow bloggers and be an integral part of this venture, please contact me at onecommentproject@gmail.com
I have also set up a separate twitter account for this second phase. It will be @1commentproject. Please follow it for blog updates and blog promotions. When we spread the word about great blogs, we all shine!
I would be looking for help with the following:
1. Finding new blogs
2. Posting Reviews of Blogs
3. Archiving a Blog roll on the Ning
4. Monitoring the Ning
I am very passionate about this project and am putting a lot of time and energy behind it. My belief is that we can all learn from each other and have endless technologies to help us collaborate! I really hope to see my PLN jump on board with me and help promote the edu-blogging community!
So join me, won't you, in using the web to share teaching best practices and encouraging others in our profession. And don't forget to customize and select colors for your own blog badge.
Friday, July 17, 2009
How to Create Successful Blogposts: Revision
On Wednesday we discussed the planning stage of creating blog posts, and yesterday we covered the drafting stage. Let's move on to an important, but often overlooked, stage of writing: revision
Revision
When I revise, I first check the sentence-by-sentence, paragraph-by-paragraph flow of the post. I make sure I've made all the appropriate transitions to keep my reader engaged. For example, in the "Jorie Spelling" post, I wrote a lone paragraph about Jorie's nasty antics: particularly the smurf bites. I was all over the place with that paragraph, unsure where and how to connect it. I eventually decided to connect Mean Girls with Jorie's mean girl behavior before bringing the text back to the Donna Martin thread. In fact, this paragraph was written after the next two, but as I thought through my transitions and the logical progression of how I revise, I kept moving it up until it placed where it is.
After I check the post's organization, I re-read it several times, focusing on word choice. In fact, I'll continue to re-read it after its published just to be sure all the wording is the way I want it. The first thing I look at are how active my verbs are. For example, I originally wrote "there wasMean Girls, which gave me . . . " but changed it to "Mean Girls gave me." Subtle change, but those action verbs mean the difference between telling a story to the reader and showing the reader the story.
Once my verbs check out, I move on to adjectives. I try to come up with unique wordcombinations that leave my readers peeing in their pants with delight--see what I mean. Part of the reason I re-read and revise so much is I find myself so darn amusing. Seriously, I love to crack myself up and so as I write, I look for ways in which I can do just that. Adjectives bring writing to life and set authors apart from others. Why say I had a C-section when I can say Mr.Busypants was surgically removed from my uterus?
Which would you laugh at? Which would you remember?
Finally, I make it a rule to re-read the entire paragraph (and sometimes the one before it) if even one revision is made in it--every time. This may seem tedious and time consuming, but the revision process brings on those syntactical errors that you probably wouldn't make in an initial draft. It's important to read each sentence fully each time you revise to minimize these sloppy errors.
Using these techniques really help me write the best blogs I can write. The time pressure still keeps me from making them all that I want them to be, but I'm usually happy each post that I publish. I love making those unique connections that make my writing my own version of the Donna Martin original. Ah, I'm ending on yet another connection.
Subscribe to:
Posts (Atom)


